Chic Lunch Bag, Part One
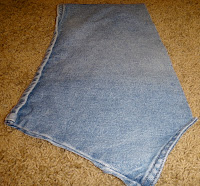
I've decided the medium for said lunch bag will be a pair of my hubby's old jean shorts that he, knowing me quite well, kindly donated to my studio rather than the trash heap. I'll give you a basic idea how to make this lunch bag in a two-part series.
Cut out one of the front panels for the lunch bag. Find some images you want to use and sew them to the front panel, taking care to move the pocket out of the way so that it is still fully functional.
Aren't these images so doggone cute? I chose some coordinating fabrics to create 'patches.' These fabrics will be worked in to the sides and top panel of the finished bag.
The lunch bag will be pretty wide to accommodate tupperware dishes. Since I had some leg left from the back side of the shorts, I'm adding that to the length of the bag. I squared up the piece and stitched it to the front panel like this:
This long panel will become the front, bottom and back sides of the lunch bag.
Now choose images for what will be the back side. Here are some that continue with the avian theme...
Be sure to sew the patches going the proper direction for when the bag is standing up.
Here is what the full panel should look like now.
*Click here for the directions to complete the bag!*
Q: Did you ever take your lunch to school? If so, was it the good ol' brown bag, or did you have a favorite lunch box?


I love your crafts! The vintage pictures with the cute sayings are great! Where do you get the sayings you are including? I have tried to see if there is any kind of link to a place to find them but so far I haven't found one. Can you help me with that?
ReplyDeleteThanks for all the great ideas! I think my newlywed daughter is getting an apron for Christmas if I can find the quotes you're using.